FAQ
These FAQs were initiated in mid April. Please check back for improvements.
- What are the different tonal characteristics of wood species for use in tonerings?
- How much does it cost to build a rim lathe?
- I can't afford a lathe, do you have any other solutions?
- Could you show how you cut and assemble a block rim?
- Could you give me some tips on attaching a banjo neck to a rim using coordinator rods?
- How do you install the endbolt-compatible coordinator rod on a partial internal resonator rim?
- Where do I buy the components for the lathe?
How much does it cost to build a rim lathe?
A basic rim lathe can cost between $1,200 and $2.000 to build and equip. This is necessarily a failrly wide range because final cost will depend a lot upon how much you can do yourself and how much you must pay others to do for you. A tooling set can be made for as little as $50 if you have access to a machine tools and a metal supplier who sells odd lots of aluminum. If you want to add CNC capability to your lathe it will cost another $1,000 for a controller, motors and a computer.
Dan Pennington has engineered a way to add cross slides to an existing standard lathe and lathe bed. Click here for a description. This strategy is A LOT less expensive and the modifications to your lathe are reversible any time you want to go back to a standard configuration.
I can't afford a lathe, do you have any other solutions?
Yes. I made my first rims with a horizonally mounted router. I have a huge backlog of projects, but I hope some day to detail a practical solution to this problem that almost anyone can afford. The basic idea is detailed in one of the articles. Click here to see the article.
Could you show how you cut and assemble a block rim?
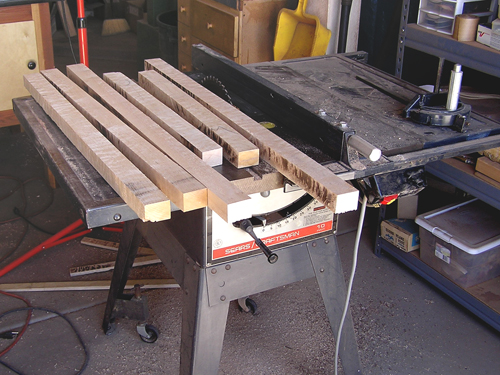
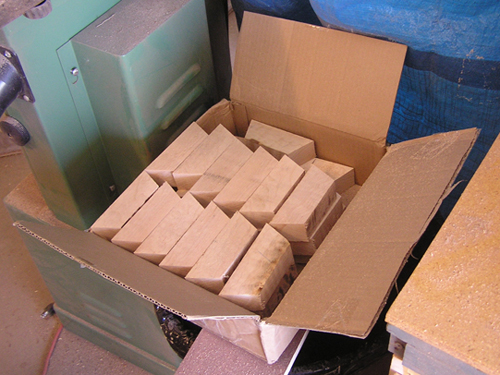
STEP 1: Cut sticks. Most rims can be made with sticks that are 1.5" wide.
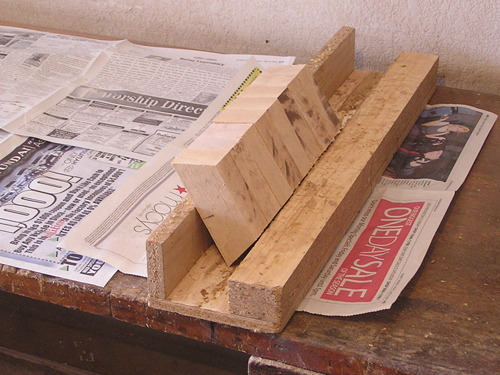
STEP 2: Make a paper pattern for the size of the block you need and set up the stop block on a mitre saw. The mitre saw should be set at 22.5 degrees for an eight piece block layer. Note that you need to pull the blade down into cutting position in contact with the paper pattern to make sure your setup is correct.
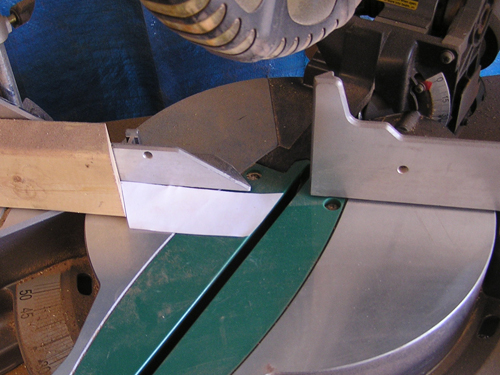
STEP 3: Cut the end of the stick.
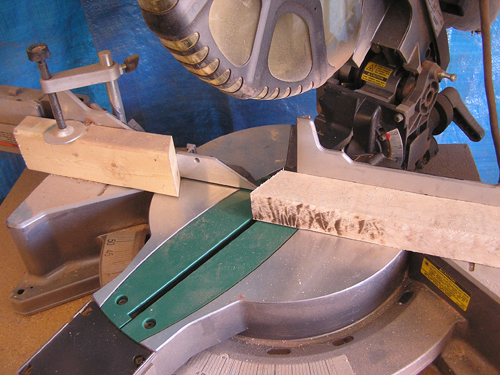
STEP 4: Flip the stick over and move it into contact with the stop block. Cut a block.
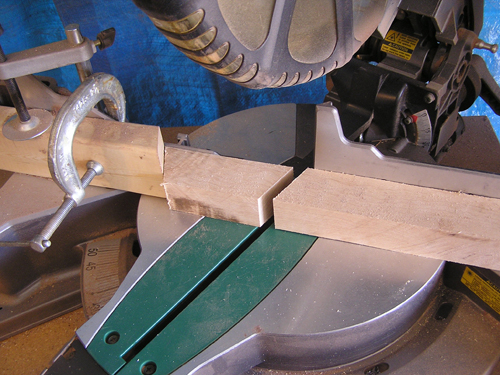
STEP 5: Cut the remainder of the sticks into blocks.
STEP 6: Place eight blocks in the gluing jig. The gluing jig has a couple of purposes. You can spread glue on the face of several blocks at once. It also keeps the glue surface level so the glue does not slide down before you are ready to assemble the blocks. I always apply glue to both ends of each block.
STEP 7: Clamp the blocks with a band clamp. It is not necessary to force the blocks level. In fact, that practice can be an impediment to good joints. It is better to let the blocks find their own level as they are drawn together.
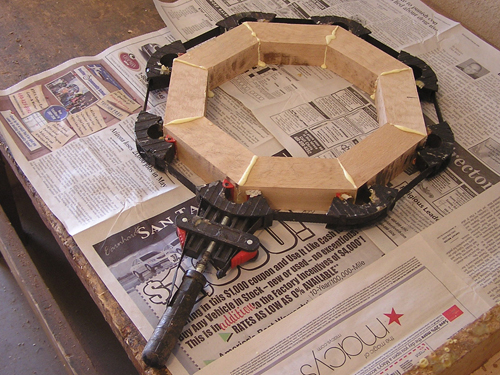
If your blocks are tall, use two clamps.
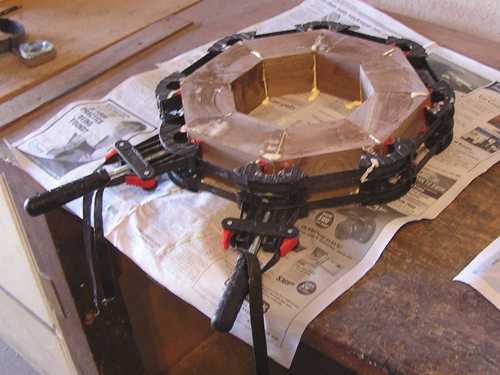
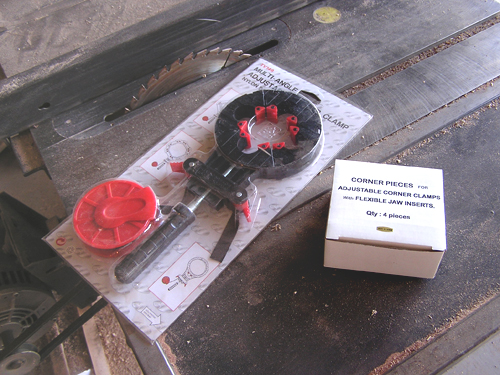
I like these clamps very much. The clamp comes in a package with only four corners. You can buy additional corners separately. The model number is TV-149. I did a Google search and did not find this exact clamp, so I don't know if they are still for sale, but I saw some similar ones that should work fine.
Could you give me some tips on attaching a banjo neck to a rim using coordinator rods?
Please check back for improvements to this page.
Let's assume that you are using a finished neck. The heel should be shaped in such a way that when you hold it up to the rim, you get an angle of about three degrees. NOTE: Three degrees is a nominal measure. Other factors make other measures acceptable. Such factors include:
- Bridge height
- Action (string height over the fingerboard) you want
- Presence of a frailing scoop.

Step 1: Locating holes for the coordinator rods.
The first challenge to locating coordinator rod holes is to find points on the circumference of the rim that are exactly opposite one another along the axis of the diameter. Machinists use a combination square, but most combination squares are too small for an 11" diameter rim. I made a similar tool out of wood.

TIP: Examine the rim for blemishes or, if your rim has purfling, the point at which the ends of the purfling strips meet. This is a good area to make the neck connection because the neck witll cover that point on the rim.
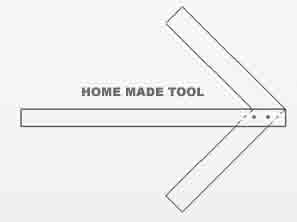
Place the combination square or your home made tool on the top of the rim. Mark tines at opposite sides of the rim. Use a square to mark vertical lines on the surface of the rim.
TIP: if you made your own tool, draw the lines on the top of the rim. Change the positio of the tool so that it is 180 degrees opposite. If the tool does not lie exactly across the lines you just drew, then it is not square. However you can still use the tool. Align the tool with one of the lines you drew and draw a line at the point of the discrepancy. The spot between the two lines can be used to locate the coordinator rod holes.
Here is an exaggerated illustration.

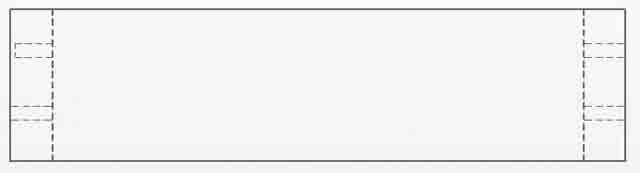
Step 2: Drill holes for the coordinator rods.
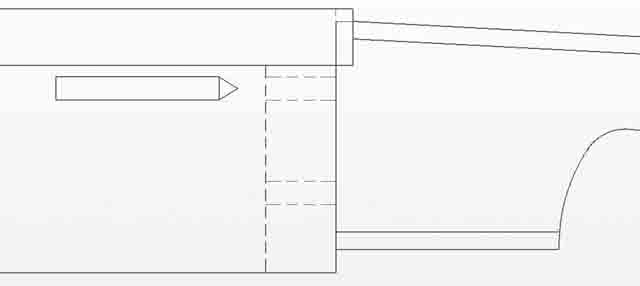
After locating the locations at both ends of the diameter you need two sets of holes at either side of the rim. These holes need to be at the same height to make the coordinator rods parallel.
Depending on the type of coordinator rods you are using, one of the holes in not a through hole. It is very difficult to locate that hole from inside the rim, so I sometimes drill a pilot hole from outside the rim all the way through and then redrill the proper dimension hole from the inside of the rim.
TIP: If you not making a bluegrass pot with a bluegrass tonering, you are free to place the coordinator rod holes where you like. I did a rough measurement from a Gibson Mastertone blueprint and it appears that the top coordinator rod is one inch (approximately 25 mm) from the top of the tonering and about 1.3 inches (approximately 33 mm) between the rods. USE THESE MEASURES AS A GUIDLINE ONLY.
Step 3: Mark the hole position on the neck heel.
Once these holes are drilled, you can use the holes at the neck end to locate and mark the holes to be drilled in the neck. Make a rod with a pointed end the same diameter as your rim holes. Hold the neck up to the rim and poke it with the rod to locate the holes for the neck heel. It is ideal if you put the rim together with all the hardware and head to see exactly where to hold the neck when you locate the holes for the neck heel. The fingerboard should be level with or just slightly higher than the notch in the tension hoop.
One mistake I made on my first banjos was that my neck angle as seen from the top was off and the strings were not equidistant from the edge of the fret board. In fact the first string was unplayable because it was so far off. Not only should you put the rim together with the hardware, you should put pegs and a slotted nut on the neck and string it up. In other words, you have to complete all functional aspects of the neck. And you need a banjo bridge and tailpiece. You don't have to use banjo strings. I have thought of using fishing line, for instance. But you need to see the final position of the strings in relation to everything else. You don't need to tighten the strings much, just enough so they keep a straight line.
Step 4: Drill the holes in the neck heel.
Do the best you can to drill the holes in the neck heel according to the backset angle of the neck in relation to the rim. This is around three degrees. You can also lay a small square on the end of the neck. The drill should be 90 degrees in relation to the concave portion of the heel.
To be honest, I use a drill press and made a very complex jig for holding the neck just right. If you are making just one banjo, it might not be worth making a jig. Also not everyone has a drill press. If you are using a hand drill, have someone watch the drilling process and tell you if your drill is not aligned properly.
Start with a small drill bit so that you can get it started exactly where you made a small indentation in the previous step. Go to a medium size drill bit and then to the final size drill. If you start drilling with a large drill bit, your drill bit may wander off the mark. This is something to avoid!

Step 5: Assembly.
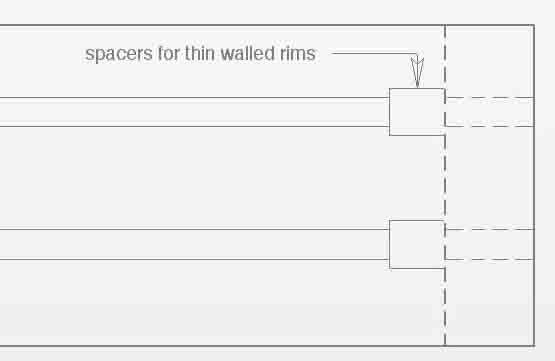
Most coordinator rods are made for 3/4 inch thick rims. If your rims walls are thinner than you may need a spacer inside the rim. You can by nylon and spacers at most hardware stores.
Put the banjo together and see the neck is in proper relation to the rim.
IF YOUR NECK IS NOT PROPERLY ALIGNED
If the neck is not properly aligned, don't despair.
One trick I used on early banjos was to drill the holes in the neck large and glue the lag bolts in the holes while the neck is held in the proper position. Use epoxy and put a layer of plastic wrap between the neck and the rim so you don't glue the neck to the rim. To make this trick work, you must have the neck and banjo completely assembled WITH STRINGS and bridge so you can see exactly where the strings lie. Hold the rim in a vise and position the neck perfectly using long pieces of tape attached to the headstock while the glue cures.
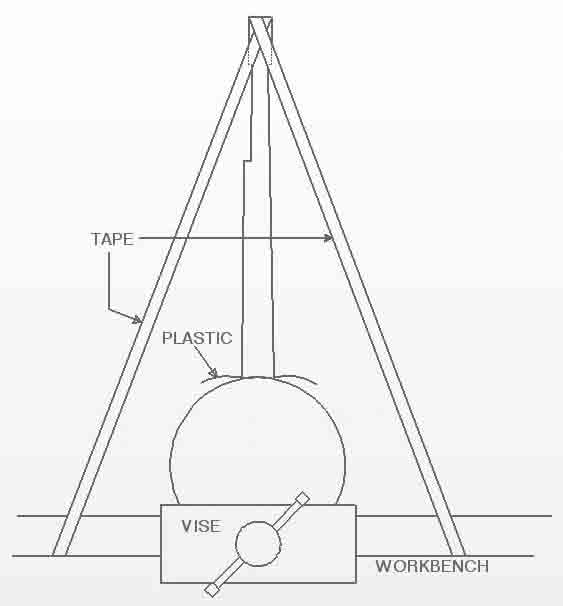
In this drawing you can see the tape holding the neck to assure proper alignment left and right. You will also need tape holding the neck backwards in the proper front to back orientation.
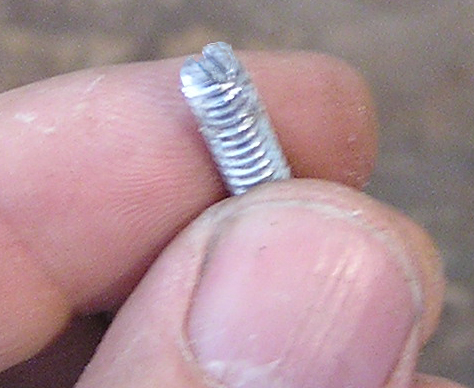
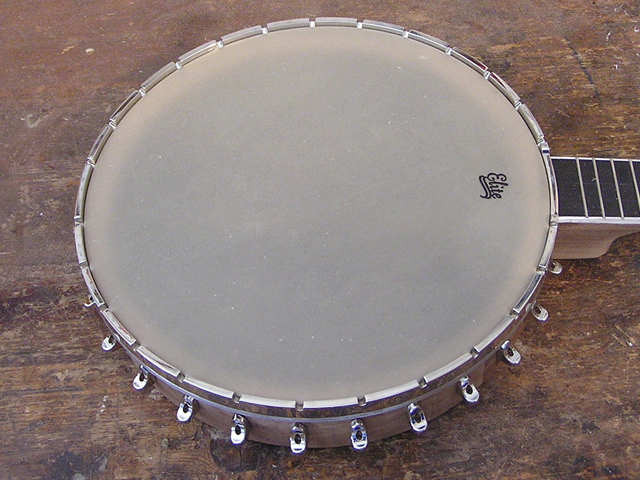
How do you install the endbolt-compatible coordinator rod on a partial internal resonator rim?
The endbolt-compatible coordinator rod is designed to work with an endbolt tailpiece holder so that open-back banjos can retail the look a traditional look on the outside of the rim.
When you install this type of coordinator rod with a partial internal resonator rim, the installation is most easily accomplished in the steps outlined here because some aspects of the assembly are not accessible from the bottom of the rim.
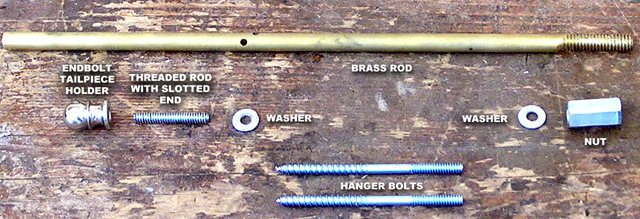
THE PARTS:
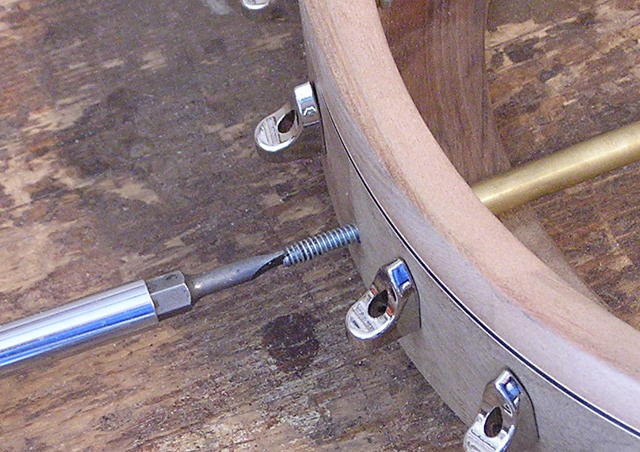
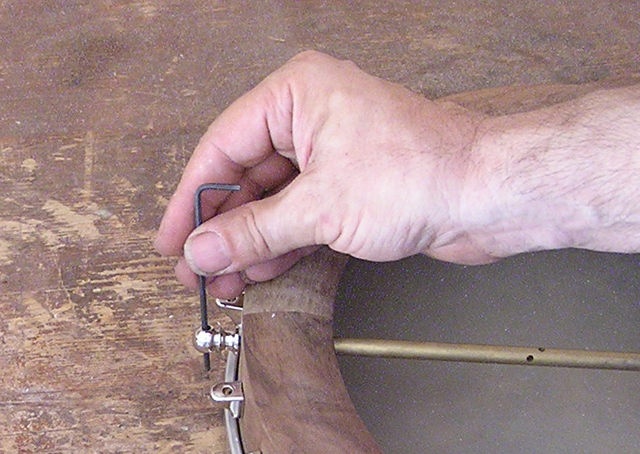
STEP 1: Install bracket shoes.
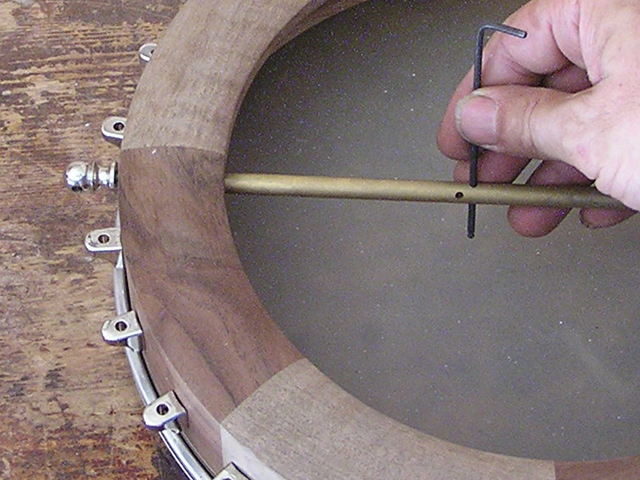
STEP 2: Screw the nut onto the brass rod.
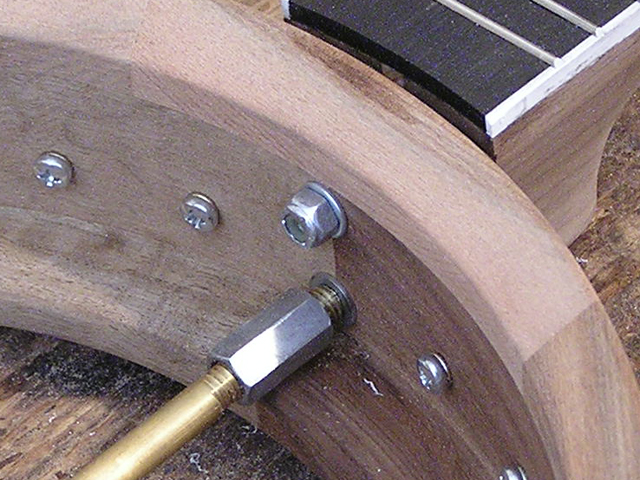
STEP 3: Attach the neck to the rim. Put a washer between the brass rod and the rim. Keep the assembly loose.
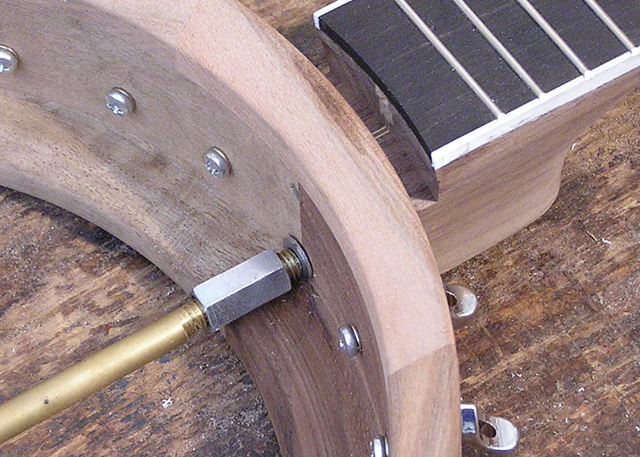
STEP 4: Screw the threaded rod in to the brass rod. Keep the slotted side of the threaded rod on the outside of the rim. Put a washer between the brass rod and the rim.
STEP 5: Screw the threaded rod into the brass rod as deeply as it will go.
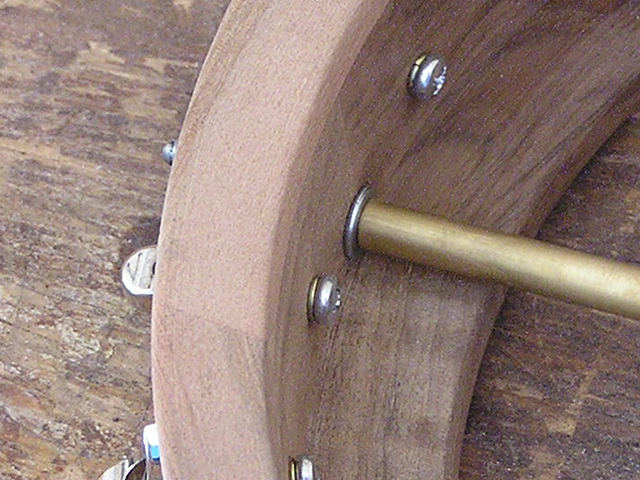
STEP 6: Put the endbolt tailpiece holder onto the threaded rod. Keep the assembly loose.
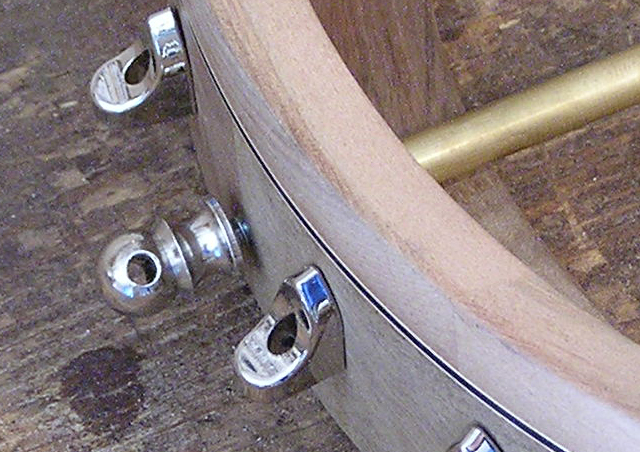
STEP 7: Add the washer and the nut for the top hanger bolt.
STEP 8: Put on the tension hoop and head.
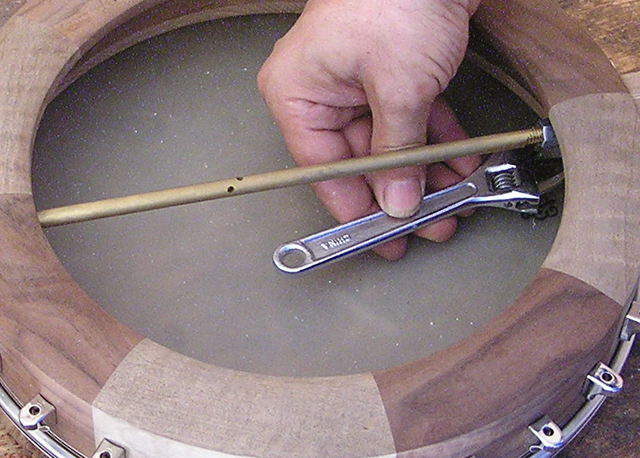
STEP 9: Tighten the coordinator rod to a snug fit. Do not tighten to the final tightness. Do the same to the rod nut, endbolt and top nut.
STEP 10: Put on hooks and nuts. Some of the hooks may require a tap to make them seat properly.
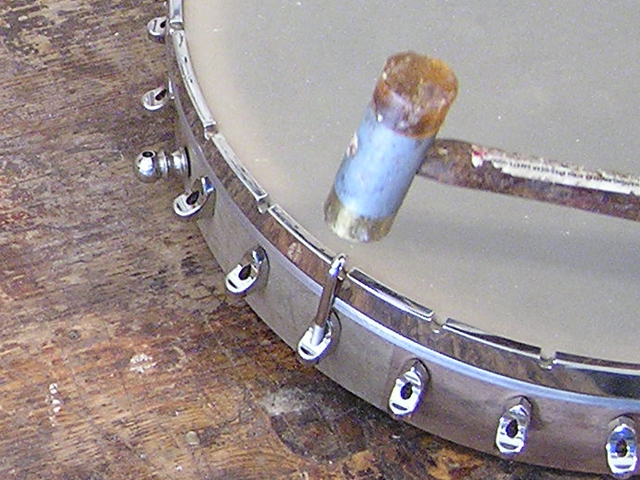
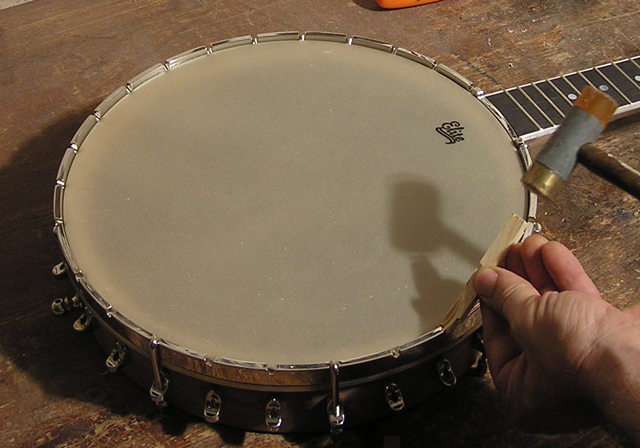
STEP 11: Check the orientation of the hooks bofore you start to tighten the hook nuts. If they are not straight, adjust the position of the tension hoop. This is difficult to do by hand, so take a small piece of wood, put it in a tension hoop notch and tap with a small hammer.
STEP 12: Tighten the head to near final tension.
STEP 13: Tighten the brass rod to final tightness. Make sure the fingerboard is parallell to the top of the tension hoop. Hold the neck in the proper position while tighteningthe brass rod if necessary.
STEP 14: Repeat other tightening operations from Step 9 until all connections are at final tightness.
Where do I buy the components for the lathe?
Most components can be bought from well-known suppliers such as Enco and Grizzly. Please refer to the list of suppliers. In many cases you will find links to products and supply companies in the list.