This jig takes care of one of the most difficult operations, that of mating the neck heel to the rim.
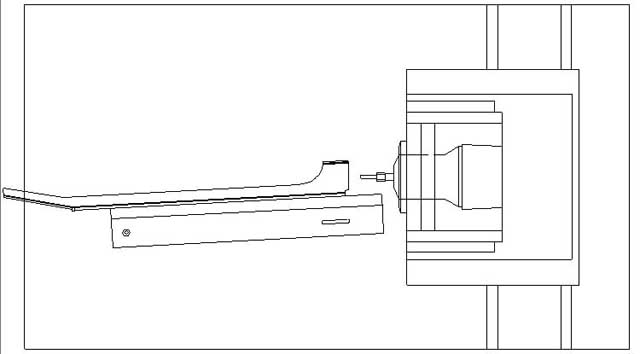 |
This is a top view schematic of the router carriage in relation to the neck support. The neck is clamped horizontally to the neck support. In this illustration and a couple others, the neck angle in relation to the position of the router is in the wrong direction, but you get the idea. (Click on the images for a larger version.) |
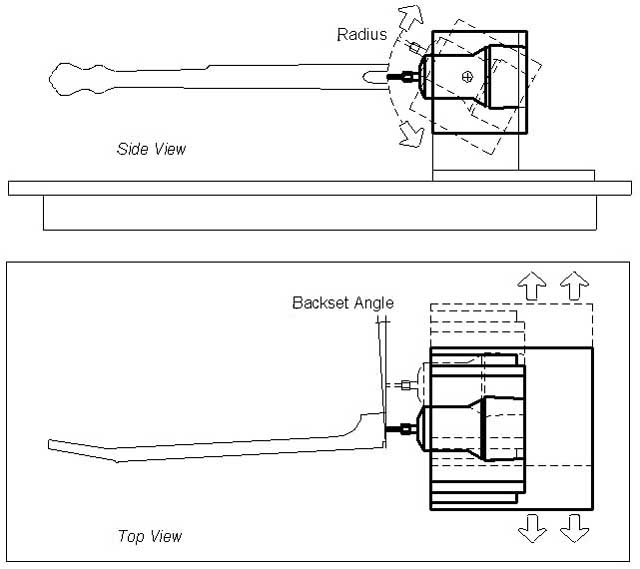 |
This is a top and side view schematic showing the router movement. One cool aspect of the concept is that by adjusting the router backwards or forwards in the jig, it yields whatever radius you need in the heel. |
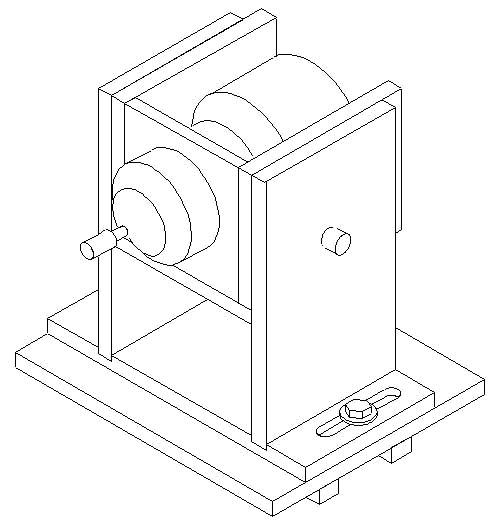 |
This is the assembled router carriage. My first prototype was made out of wood and designed to run on a track that I routed in a board. I used an old craftsman router. You can see two square runners at the bottom of the jig. This arrangement was hard to work with because of too much friction between the runners and the track. |
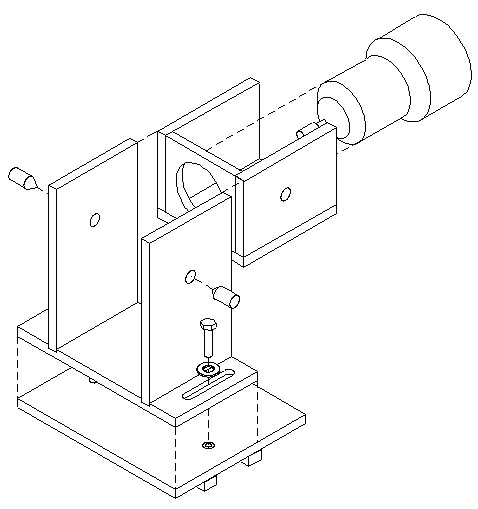 |
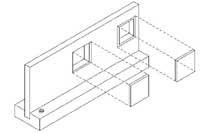
This is an exploded view of the router carriage. Note that there is a base for the pivoting box and a sub base that accomodates course adjustment forward and back. |
 |
This is the neck support. The exploded pieces are plexiglass. I had the idea that I could line up the neck better for clamping if I could see through the jig. This turned out to be unnecessary. |
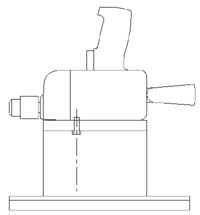 |
Mount a drill on a base and you can drill the dowel hole while the jig holds the neck in the proper position. I selected the drill based on its relatively flat top and a threaded handle hole that made it convenient for mounting. Unfortunately it was one of those heavy duty drills with a slow speed. It was really a chore to drill a 3/4" dowel hole with a forstner bit. These days I mount a drill chuck in the spindle of my lathe and advance the work using the cross slides. |
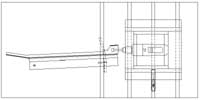 |
Here's the drilling jig in position. This doesn't work as well as I had hoped. The problem is that the wooden parts of the jig tend to flex under the pressure you exert while drilling. It's better than trying to eyeball it. Again, the neck angle in the illustration is in the wrong direction. If you actually did what the illustration shows, you'd end up with an action about 3" off the fingerboard at the twelfth fret! |
| Despite its limitation, the jig worked pretty well. I think I completed three banjos using it. My current jig is made of aluminum and creates a clean, predictable radius. |
December 17, 2003