Anyone who thinks seriously about decorating their banjos in the late 19th and early 20th century style will eventually want to carve their banjo heels. Of all the caving patterns available for study, the Whyte Laydie pattern stands out for its excellence. This article is an examination of the aesthetics of that carving pattern and attempts to put it somewhat in its historical context.
Note: all of the drawings for this article were made based on photos from a banjo in the collection of Ed Britt.
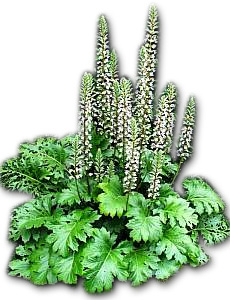
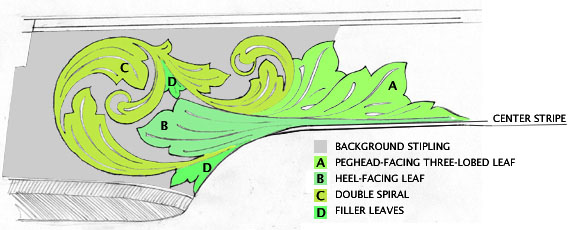
The acanthus leaf has been an inspiration for ornament since the time of ancient Greece. It also serves as the basis for the the Whyte Laydie pattern. This is a picture of a living acanthus. You can see that the leaves curve gracefully and have many notches and lobes. According to the Handbook of Ornament, published by Dover Press, The Roman version of acanthus was more rounded than the earlier Greek version which was somewhat spikey. Revival of all things classical was an aspect of 19th century life. No wonder that the Roman version of acanthus ornament ended up in the Vega factory. The Whte Laydie carving is essentially an acanthus carving. One possible way to analyze the pattern is to say that it has a major leaf facing the peghead, a major leaf facing the heel and a double spiral. (Click the image to see an enlargement.)

The late 19th century was sometimes referred to as "The Guilded Age." It was a time when ornament was in high regard. Many common items were decorated. This is a bronze cash register from the period.
Medieval European acanthus ornament can be seen in carved wood and stone.
Roman-style acanthus was revived in the Renaissance and continued on in architectural ornament and other forms of art up through the 19th century.

Acanthus ornament in medieval manuscripts was sometimes abstracted into elongated, ribbon-like forms.
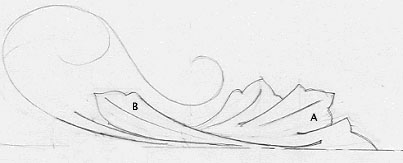
One aspect of the carving stands out as particularly ingenious. The carving moves in two directions at once and does so in perfect harmony. This is a schematic sketch of how this trick is accomplished.
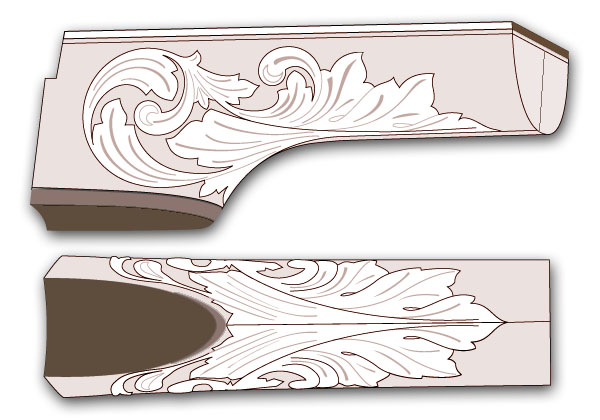
Click on the image to the left to enlarge it. Try to identify the elements of the carving.
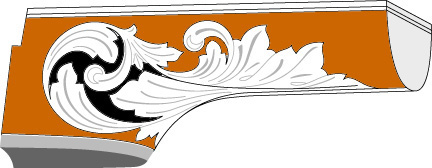
Observe the negative space (shown in black). It makes a beautiful shape all by itself!.
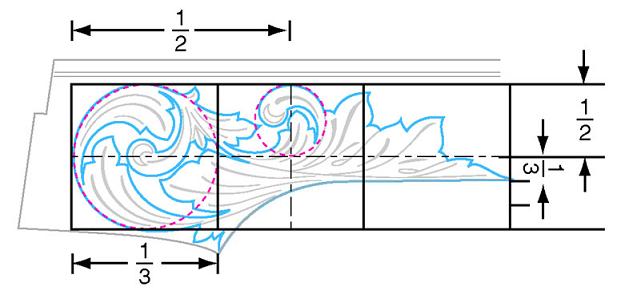
The pattern has some interesting underlying geometry. The circle defining the smaller spiral is half the size of the circle that definesthe larger spiral. The horizontal center of the smaller spiral is at the horizontal center of the carving. The length of the carving is three times the circumference of the larger spiral. The verticle center of the larger spiral is at the verticle center of the carving.
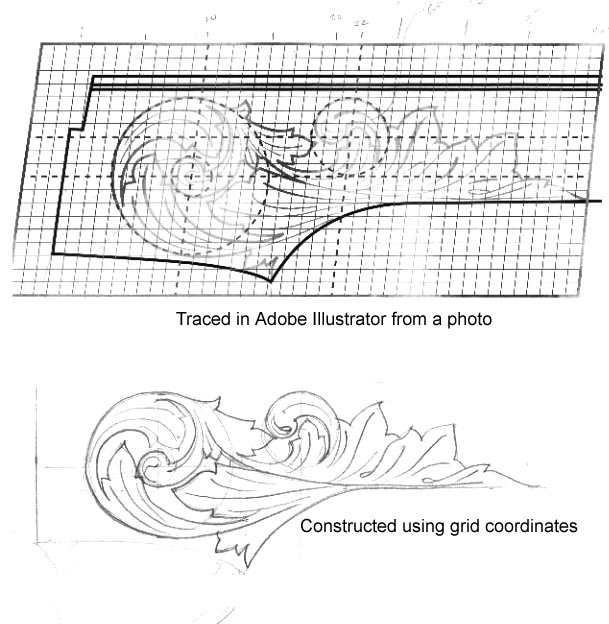
Click on the image to see an attempt to reconstruct the pattern from the grid (big file, be patient). At this point I have not tried to transfer the pattern to a neck in 3D. That's my next challenge!