Prototype 1
I have been working on affordable rim technology for many years. My first attempt at an accurate rim machine culminated in a design using a laminate trimmer (a kind of specialized router) mounted horizontally. This method is documented here in the articles section of this website. I used this lathe to create most of the rims you'll see in my gallery. I have since moved on to Prototype 2, the lathe featured in my DVD "Introducing the Rim Lathe."
Prototype 1 has a couple of features that are actually superior to Prototype 2, including a heavy duty cross slide at the side of the lathe head and an additional set of bearings at the top of the lathe head that can drive a flexshaft. It also features an external motor and belt drive that gives you a greater variety of speeds than on Prototype 2. (The origninal motor inside the head is no longer working.) Please go to azbanjo(dot)com to for more information.
Tooling
 |
There are two basic strategies for turning rims:
Prototype 1 was used exclusively for faceplate turning. After I had built Prototype 2, I discovered a company in Canada that supplies an excellent expandable jaw chuck. |
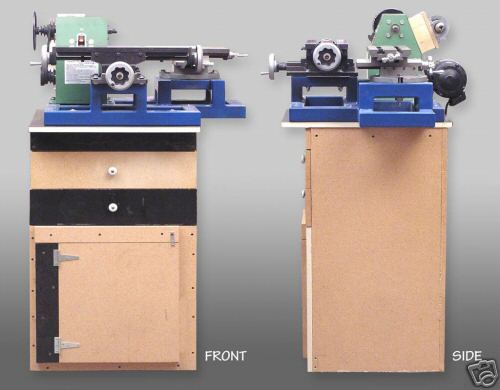 |
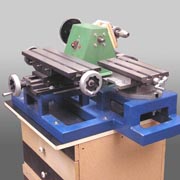
Front and side views of prototype 1. There are two different cross slides. The cross slide at the side of the lathe head is more heavy duty and has a nice smooth action. This cross slide can only be used at the side because the X axis has handles on both sides of the table. This would prevents you from getting right up close to the work if you were to use it at the front of the lathe head. The cross slide in front of the lathe head has only one handle per axis, so you can get as close to the work as you need. |
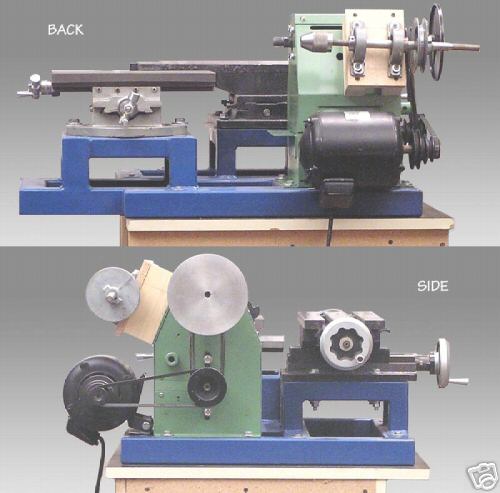 |
Back and side view of the Prototype 1 lathe. The original motor became inoperable so I added an external motor. This arrangement allows for a good range of speeds, including slower speeds than are available on the Prototype 2 lathe. I added a second shaft to the lathe head which can be driven by the motor by rearranging the belts. I had hoped to use this shaft with a flex shaft, perhaps to drill bracket shoe holes without taking the rim off the lathe. |
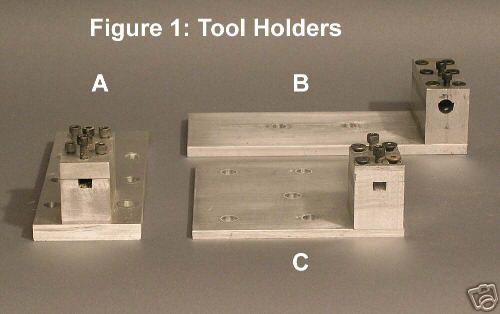 |
Figure 1 - Tool Holders. Item "A" is used on the cross slide at the side of the lathe head. It is mostly used for cutting the side of the rim. Item "C" is used on the cross slide in front of the lathe head. It is mostly used for cutting the bottom and top edge of the rim. "B" is used to hold a boring bar with 1/2" shank for cutting the inside of the rim. |
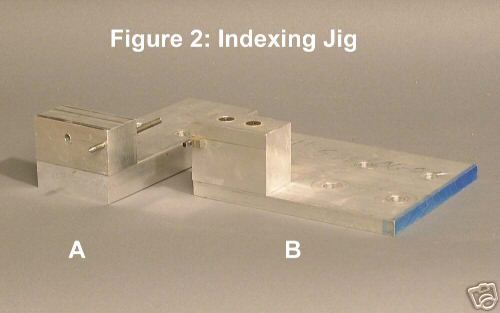 |
Figure 2 - Indexing Jig. The indexing jig helps you locate bracket shoe holes so they align perfectly with a notched tension hoop. It works on any rim regardless of diameter or spacing of the notches. All you need is the actual tension hoop. Item "A" is a striking pin that punches an indent for guiding your drill bit. Item "B" is a pin that interfaces with the tension hoop notches. The use of the indexing jig is covered in the my DVD "Introducing the Rim Lathe". I am including the DVD with the purchase of this lathe. |
 |
Figure 3 - Dial Indicator & Holder. A dial indicator can be used in a number of different ways to assure accuracy. I made this stand, but other low cost stands are available. A dial indicator is a very useful tool and has a number of applications. One of these applications is documented here in the articles section of this website. |
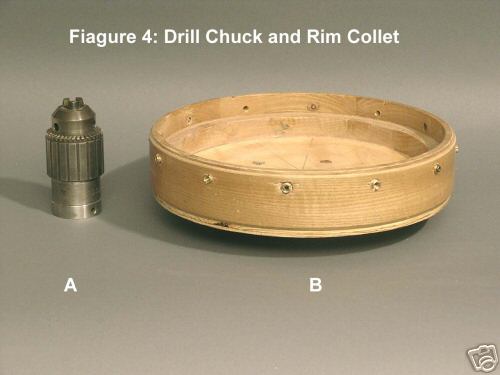 |
Figure 4 - Drill Chuck and Rim Collet The chuck takes drill bits up to 5/8" in diameter and can be put on the lathe head for horizontal drilling operations. I used this arrangement for drilling dowel holes in necks for open back banjos. You need the collet if you are doing faceplate turning. The collet holds the semi-finished rim so you can deal with the bottom of the rim after it is parted from the faceplate. Faceplate truning is covered in the DVD. |
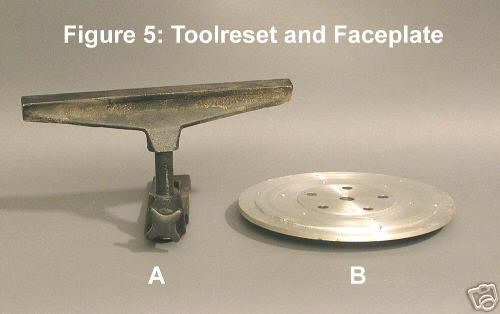 |
Figure 5 - Toolrest and Faceplate. You can bolt the toolrest to the cross slides and use tradtional hand-held cutting tools. This is an important function when you want to turn a convex countour such as the bead above the tube in a 2-piece flange. The faceplate is made of aluminum and is best for mounting rim blanks with double-stick tape. It works great and holds the rim with enough force to do any operation you care to do. |
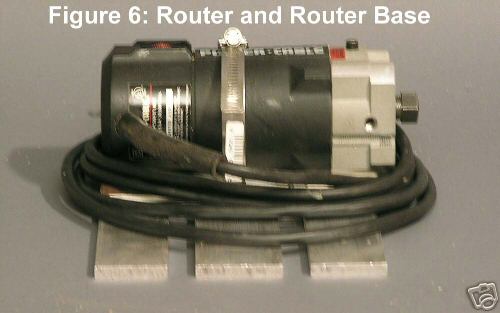 |
Figure 6 - Router and Router Base. The router can be used to part rims off the faceplate. It is also useful in a number of ways to add purfling and splines to your rims. This technique is documented here in on of my articles on this website. |